 |
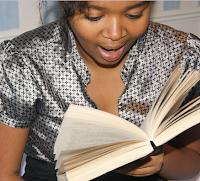
| Original photograph above and below photo -shopped photograph,the image has been airbrushed and quality and colour has been improved. |
 |
| Original photo above and below photo-shopped version.The photo has been cropped and the picture quality has been improved. |
 |
 |
| Original photograph above and photo-shopped version below.I have cropped the photograph and improved colour balance. |
 |
| Above is the original photograph and below is the phtoshopped version.I cropped the photo and improved vibrancy and picture quality. |
 |
| Above is original photograph and below photo-shopped version,I have improved picture quality,colour balance and vibrancy. |
 |
| Above is the original photograph and below is the phtoshopped version.The photograph has been cropped,picture quality and vibrancy has been enhanced. |
Stage4:
 |
| I then added the captions below my image using a text box. |
 |
| I then began to import the rest of my photographs and started completing my contents table.I used the stroke tool to thicken the frame of my contents table,photos and captions. |
 |
| I imported the pictures into InDesign by dragging them,from a saved file. |
Stage 2 :


No comments:
Post a Comment